sudo apt-get install compiz compizconfig-settings-manager
If you are running Kubuntu then use this command to install the most commonly needed packages.
sudo apt-get install compiz compizconfig-settings-manager compiz-kde compiz-fusion-plugins-main compiz-fusion-plugins-extra emerald librsvg2-common
If you are missing the window decorations, then you most likely need the compiz-kde, or emerald packages.
Run Compiz
To run Compiz for the current session, hold Alt, then press F2, then enter the following command, or for better trouble shooting, open up a Terminal window and use the following command.
compiz --replace
Configure
To configure Compiz and associated plugins, hold Alt, then press F2, then enter the command, or use any Terminal.
ccsm
If ccsm is not found its installable from the compizconfig-settings-manager package.
Alternatively, for Ubuntu: System -> Preferences -> CompizConfig Settings Manager
And for Kubuntu: KMenu -> Settings -> CompizConfig Settings Manager or KMenu -> Settings -> Advanced Desktop Effects Settings
You can select different themes with the emerald-theme-manager tool. To download the themes for emerald You must first install subversion, then activate the theme repositories.
sudo apt-get install subversion
svn ls https://svn.generation.no/emerald-themes
You can then use the "Fetch GPL'd themes" button of The "emerald-theme-manager" tool.
Window Decorators
Information on the 3 window decorators can be found at http://wiki.compiz-fusion.org/Plugins/Decoration
Currently there are 3 choices in what window decorator to use. They work with compiz to give your windows the various borders, and widgets.
For kde one normally uses the command
kde-window-decorator --replace
For Gnome the command
gtk-window-decorator --replace
If you perfer somthing different , the emerald decorator is worth checking out, Use it with.
emerald --replace
Add Compiz Startup (optional)
For Ubuntu
Go to System -> Preferences -> Desktop Effects and click 'Enable Desktop Effects'
For Kubuntu
Open Konsole (KMenu -> System -> Konsole) and type in these commands:
echo "compiz --replace" > ~/.kde/Autostart/startcompiz.sh
chmod +x ~/.kde/Autostart/startcompiz.sh
This creates a 'startcompiz.sh' script in the ~/.kde/Autostart directory, if you wish you may also want to have the script start up 'emerald --replace' or other window decorator for your system, such as in this example.
$ cat ~/.kde/Autostart/startcompiz.sh
compiz --replace &
emerald --replace &
Information on the 3 window decorators can be found at http://wiki.compiz-fusion.org/Plugins/Decoration
Troubleshooting
Ubuntu 10.04 : ccsm/compiz config options don't show any effect and are reset the next time ccsm is started ? go to Preferences, and if gconf is selected as a back-end, then make sure that the checkbox "Enable integration into the desktop environment" is UNCHECKED.
Under Kubuntu, some settings in the Compiz Settings Manager may not be selectable unless you enable the "Flat-File Configuration Backend" Under the CCSM tool -> Preferences -> (Backend drop down menu)
If you ran nvidia-settings, then your xorg.conf lost some info. To fix your compiz window decorations (titlebars) with an nVidia graphics card, run
sudo nvidia-xconfig --add-argb-glx-visuals -d 24
then restart X by logging out and back in again and selecting "Restart X Server" from the login menu.
If you want to stop Compiz and start the old window manager (metacity or kwin), just press Alt+F2 and put in the following for Ubuntu
metacity --replace
# Alternate syntax if you receive: 'Window Manager error: Unable to Open X display'
# when using the above command. The correct --display= value can be determined by
# issuing the 'who' command and noting the values in parenthesis at line-end.
metacity --display=:0.0 --replace
Or for Kubuntu
kwin --replace
Remastering adalah Perombakan atau modifikasi sistem operasi diamana kita bisa
manambah, merubah dan menghapus fitur-fitur yang ada di SO. Remastering bahkan bisa
memperindah tampilan sistem operasi sesuai dengan keinginannaya masing-masing.
Tanpa banyak basa basi lagi,pada tutorial ini saya akan membahas “bagaimana cara
remastering sebuah sistem operasi linux?”Berikut detailnya:
Kebutuhan Sistem :
- Ubuntu 9.10
- Repository (offline or online)
- UCK (di sarankan menggunakan UCK versi 2.0.10 ke atas)
- Minimum free space 5-7GB
- RAM 1 GB, Swap 1GB (Recommended)
- Qemu atau virtualbox
Yang dibutuhkan untuk remastering :
- File (splash.pcx, boot usplash(.so), xspalsh, walpaper, theme)
- File iso ubuntu 9.10-karmic.iso
Perintah-perintah untuk mengakses repository
Contoh Kongfigurasi Sources.list lewat jaringan
deb http://10.10.10.1/1 karmic main restricted
deb http://10.10.10.1/2 karmic main multiverse restricted
deb http://10.10.10.1/3 karmic multiverse universe
deb http://10.10.10.1/4 karmic universe
deb http://10.10.10.1/5 karmic universe
deb http://10.10.10.1/6 karmic universe
deb http://10.10.10.1/7 karmic universe
Contoh Kongfigurasi Sources.list di komputer lokal
deb file:///media/DATA/REPO_910/1 karmic main restricted
deb file:///media/DATA/REPO_910/2 karmic main multiverse restricted
deb file:///media/DATA/REPO_910/3 karmic multiverse universe
deb file:///media/DATA/REPO_910/4 karmic universe
deb file:///media/DATA/REPO_910/5 karmic universe
deb file:///media/DATA/REPO_910/6 karmic universe
deb file:///media/DATA/REPO_910/7 karmic universe
Perintah untuk Membuka Sources.list
fadly@fadly-G41M-ES2L:~$sudo su
[sudo] password for fadly:
fadly@fadly-G41M-ES2L:/home/fadly# gedit /etc/apt/sources.list
Perintah untuk mengupdate sources.list yang telah di ubah
fadly@fadly-G41M-ES2L:/home/fadly# sudo apt-get update
Ok, jika semua sudah siap,, langsung ketahap remastering.
Pertama, buka program UCK yang ada di :
“Applications → System Tools → Ubuntu Customization Kit”
Setelah itu maka akan muncul jendela “WELCOME”, silahkan klik “close”
pada window pemilihan bahasa, pilih satu bahasa saja yang akan digunakan
pada window language live cd, pilih satu bahasa saja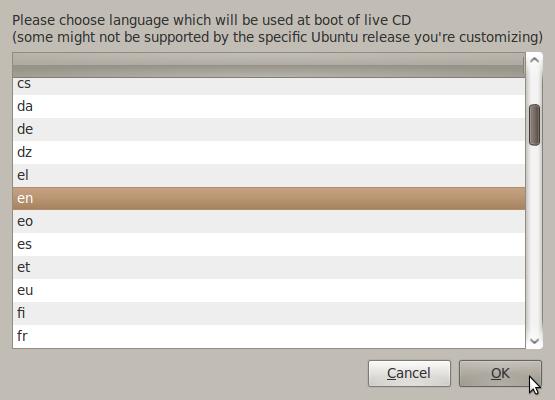
pada pemilihan desktop environment, pilih salah satu, disini saya memilih gnome
kemudian pilih file iso ubuntu anda
Selanjutnya akan muncul konfirmasi, apakah kita ingin mengkostumasi secara manual
selama proses berlangsung. Pilihan “yes” sangat dianjurkan karena kita akan mengkostum
desktop dan menambah aplikasi lainnya.
Selanjutnya muncul lagi konfirmasi, apakah kita akan menghapus paket wubi dll, yang terkait
pada proses instalasi ubuntu di dalam sistem operasi lainnya.
Kemudian akan muncul kotak dialog yang berisikan sistem siap membangun distro anda.
Anda cukup menekan tombol “Close” untuk memulai proses remastering. Maka akan ada
terminal yang melakukan proses mounting data.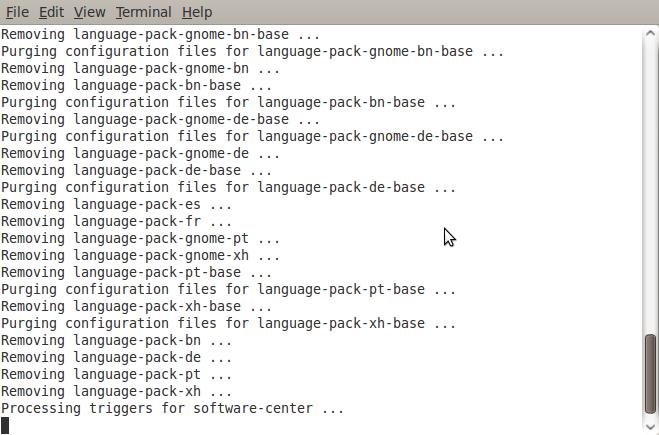
Selanjutnya akan muncul kotak dialog seperti ini :
Jika kita memilih “Run package manager” maka synaptic akan terbuka dan kita dapat
melakukan add/remove aplikasi dari synaptic. Jika anda “Run console application” maka akan
terbuka sebuah terminal yang telah di chroot sehingga kita dapat melakukan kostumisasi,menambah
aplikasi,menghapus aplikasi,mengubah tampilan desktop dll dariterminal/console ini. Penggunaan pilihan ini sangat dianjurkan untuk remastering.Jika anda memilih “Continue building” maka proses building sebuah distro akan dilanjutkan.
Jika anda tidak dalam keadaan online maka proses akan terhenti karena ada packet yang
akan di download oleh UCK. Oleh karena itu sebaiknya remastering dilakukan ketika anda
terhubung dengan internet atau menyiapkan repository terlebih dahulu. Untuk tahap pertama,
kita melakukan add/remove programs dulu dengan program2 yang kita butuhkan
dan membuang aplikasi yang tidak kita butuhkan... saya tasa tidak perlu panjang lebar untuk
mengetahui cara add/remove programs ini. Ok, langsung saja memilih opsi “Run package
manager”.Setelah tahap ini selesai, silahkan close jendela nautilus..
kemudian setelah itu.....................
Pada tutorial kali ini saya menggunakan “Run console application”, karena lebih mudah untuk
mengkostumisasinya...
setelah muncul terminal/konsole dari chroot, saatnya kita mengkostumisasi seluruhnya tahap
per tahap.
Tahap 1 - customization live cd boot and pcx splash
pada awal booting live cd, maka akan muncul pemilihan bahasa, untuk mengubah
backgroundnya,buka nautilus root dengan cara menekan “alt+f2” untuk run applications
kemudian masukkan perintah “gksu nautilus”.
Kemudian cari folder kerja dari UCK yaitu : “home/fadly/tmp”, lalu lanjutkan ke folder “
home/fadly/tmp/remaster-iso/isolinux”.
Setelah itu, kita rubah text untuk menu awal pas booting live cd dengan cara yang sama
seperti yang di atas, yaitu tinggal mencari file “text.conf”.
saya cuma merubah isi text “label live, label check, label memtest” dan “label live-install”.
Kurang lebih seperti ini :
default live
label live
menu label ^Cicipi Ubuntu 9.10 live cd
kernel /casper/vmlinuz
append file=/cdrom/preseed/ubuntu.seed boot=casper initrd=/casper/initrd.lz quiet
splash --
label live-install
menu label ^Langsung Install Ubuntu
kernel /casper/vmlinuz
append file=/cdrom/preseed/ubuntu.seed boot=casper only-ubiquity
initrd=/casper/initrd.lz quiet splash --
label check
menu label ^Check N richek disk
kernel /casper/vmlinuz
append boot=casper integrity-check initrd=/casper/initrd.lz quiet splash --
label memtest
menu label Test ^memorandum
kernel /install/mt86plus
label hd
menu label ^Boot from first hard disk
localboot 0x80
Tahap 2 - customization xsplash
Untuk mengkostumisasi xplash,, kembali lagi ke jendela nautilus root tadi, lalu browse ke
folder
“/home/fadly/tmp/remaster-root/usr/share/images/xsplash”, lalu replace gambar2 yang ada
disitu
dengan gambar yang telah disiapkan..
Tahap 3- customization background/wallpaper
Untuk mengkostumisasi background, kembali kejendela nautilus root tadi lalu
browse ke folder
“/home/fadly/tmp/remaster-root/usr/share/backgrounds” kemudian replace file
“warty-final- ubuntu.png” dengan file yang sudah disediakan.
Tahap 4- customization theme
Untuk kostumisasi tema/theme, kembali lagi ke jendela nautilus root lalu arahkan kefolder
“/home/fadly/tmp/remaster-root/usr/share/themes/Human” kemudian replace filenya dengan
file yang telah disiapkan tadi. Anda juga bisa mengkostumisasi sesuka hati jika anda lebih
giat lagi. ~_^
Tahap 5- building
oke, semua proses kostumisasi sudah selesai,, sekarang saatnya tahap building iso
image dari hasil
remastering tadi... langsung saja pilih “continue building”
ada kalanya proses building gagal.. maka dari itu kita lakukan cara alternative... buka
terminal baru,
Lalu ketikkan perintah :
fadly@fadly-G41M-ES2L:~$ sudo uck-remaster-pack-rootfs
fadly@fadly-G41M-ES2L:~$ sudo uck-remaster-pack-iso remasteramcc.iso
tunggu sampai proses selesai.. dan
jika sudah selesai, file iso berada di folder
“/home/fadly/tmp/remaster-new-files”
Semoga bermanfaat....!!!


